Learning about AR/VR
- Details
- By Paulo Menezes
- Category: Augmented & Virtual Reality Module
- Hits: 3849
- Details
- By Nuno Gouveia
- Category: Augmented & Virtual Reality Module
- Hits: 1160
Manipulation of objects is one of the most fundamental tasks in everyday life. To further enhance the immersion of the user in Augmented and Virtual Reality Environments, objects and their virtual representation are added, making the experience more authentic.
In the following article, a guide to the development of a low-cost IMU-based object is presented.

Wireless Internet connected cube with IMU
Material & Assembly
In order to assemble an instrumented object like the one presented in the image above, you'll need the following material:
1 x ESP8266, 1 x MPU-9250 (alternatively you can use a MPU-6050), 1 x Universal PCB, 1 x 3.3V Voltage Regulator, 1 x battery, preferably a header that suits the battery to be used (alternatively a 2-pin right angle header can be used), 1 x single socket female header, 1 x two socket female header and a Capacitor (6.3V 100 microfarad).
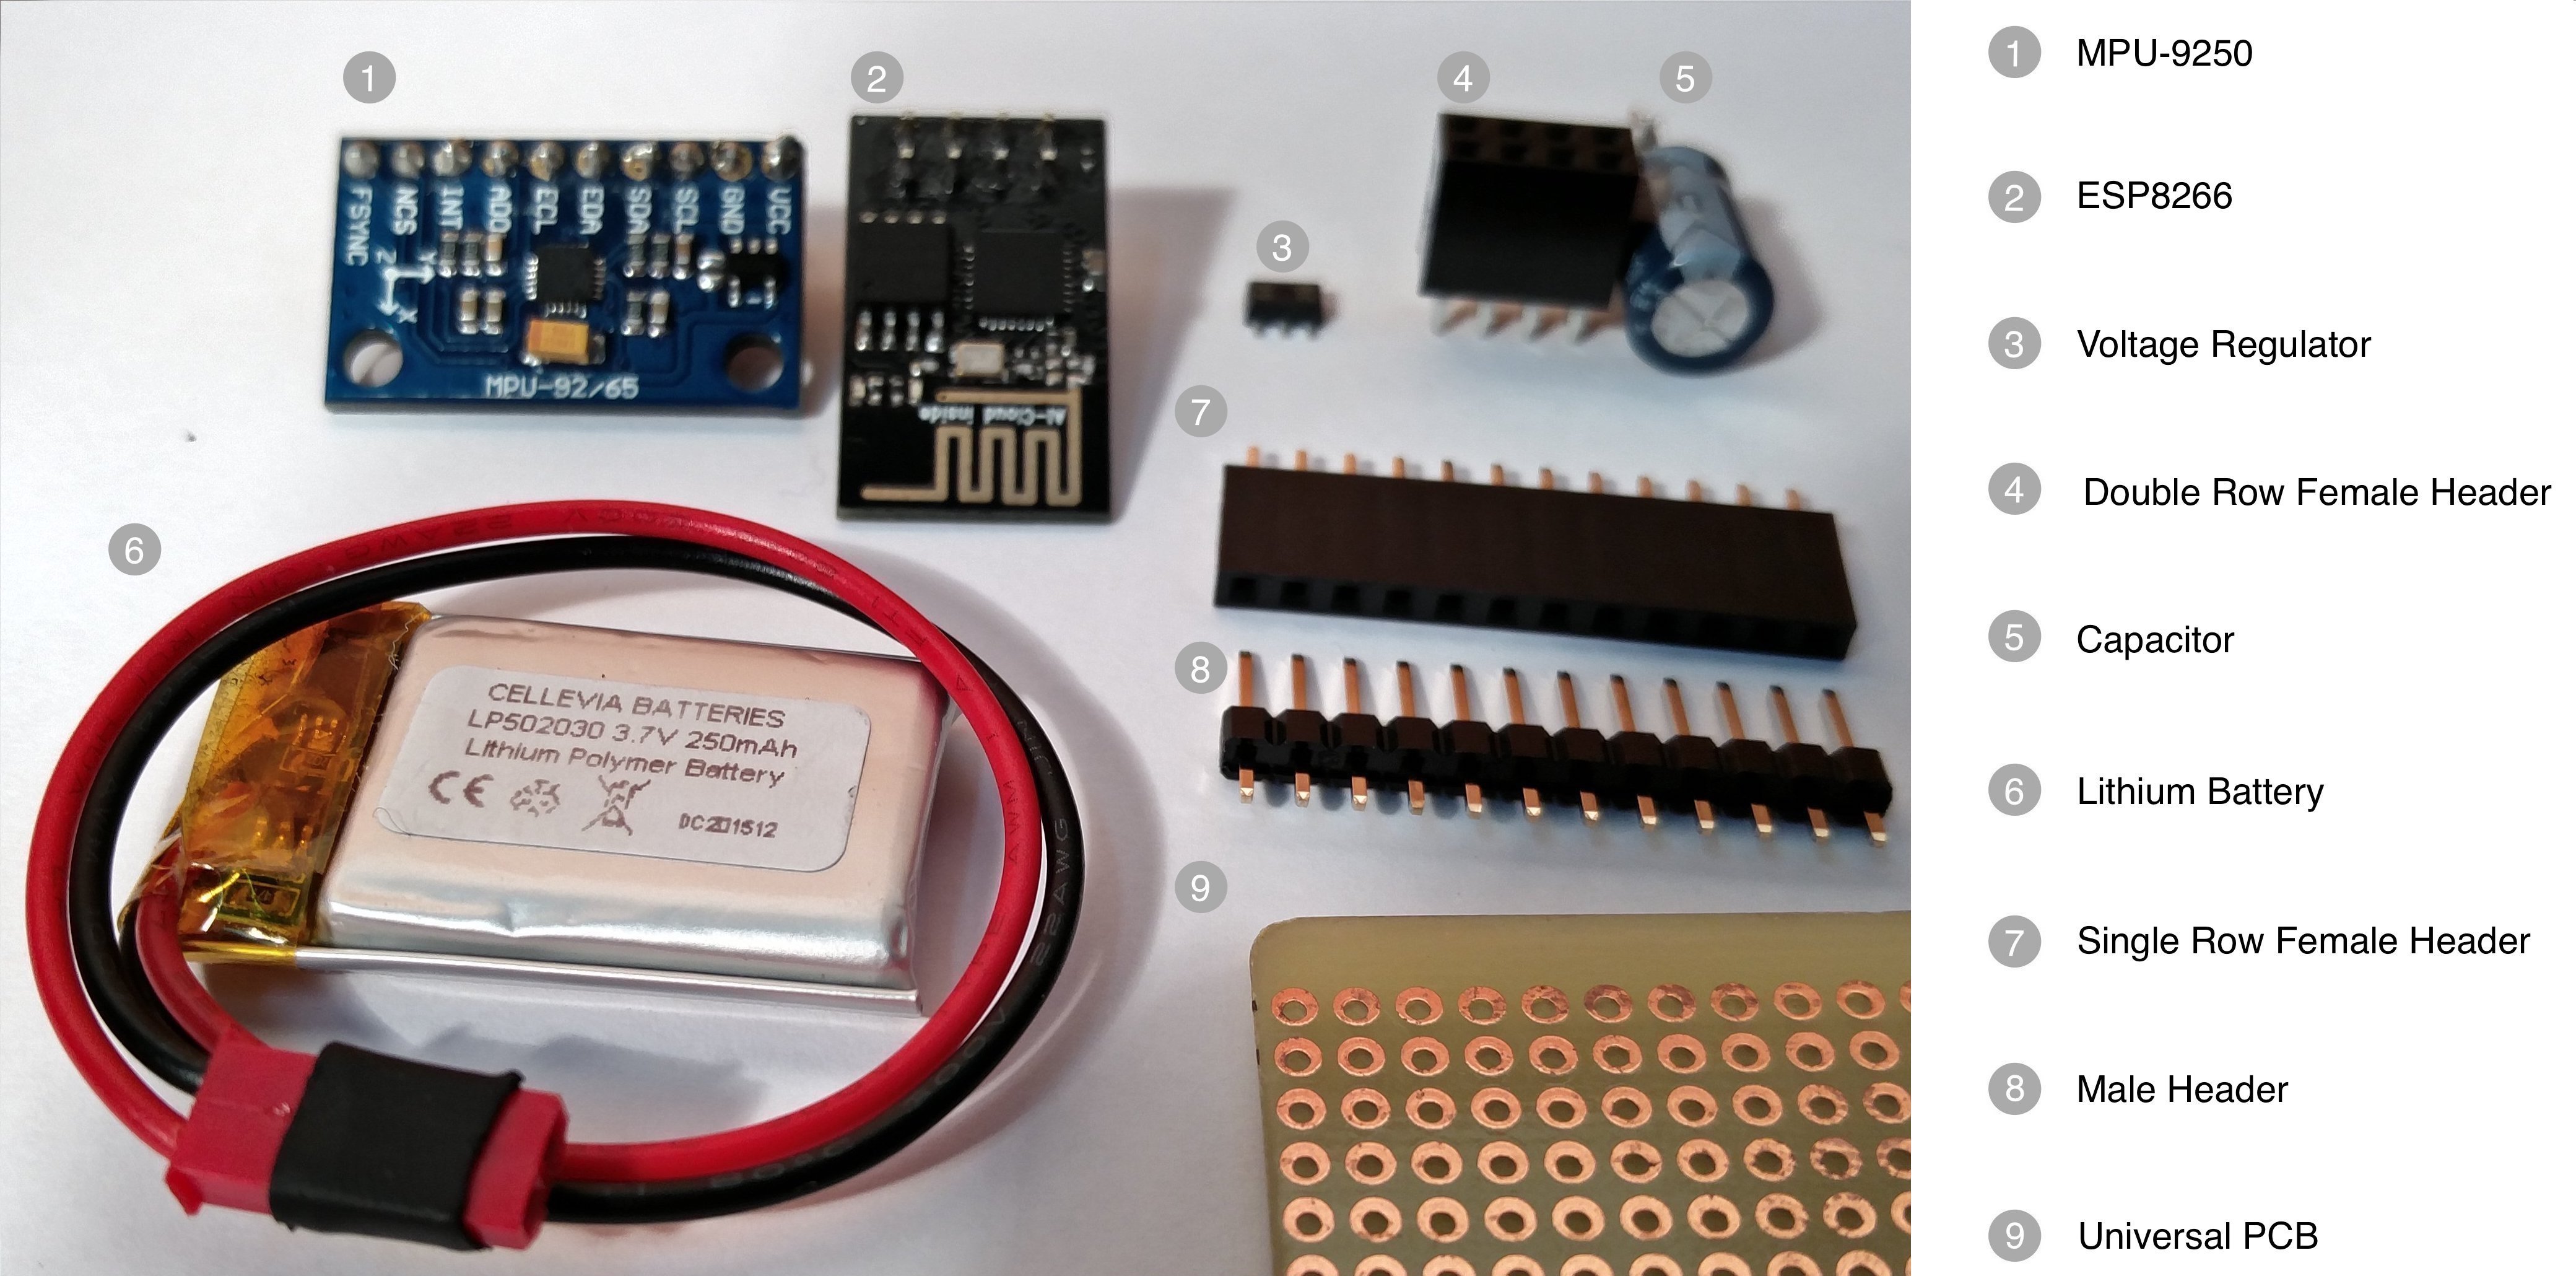
Material required for object instrumentation
Note: Don't forget your soldering material, it's also required for the assembly.
Hardware Assembly
Start by soldering the battery header (or a 2-pin right angle header) to the Universal PCB, you may wanna do this in the corner of the board if your goal is to make the design as small as possible. Next, solder both female headers to the PCB and make the necessary connections between them and the battery header (look at the figure bellow), these will be where you’ll connect the ESP and the MPU. Be careful to leave enough space between the headers (at least 3 holes of the PCB), in order to avoid the ESP and MPU bending/pressuring each other. After this, connect the positive and negative ends of the battery header to the Input and GND of the voltage regulator, respectively.
Finally, lets make the connections to the Capacitor, connect the GND and the output of the regulator to the negative and positive end of the capacitor, alternatively you can connect the negative of the capacitor directly to the negative of the battery if it’s easier.
The following image, show the required connections for the assembly of the instrumented object.

Hardware required connections
Cube Assembly
In the following link you can get the layout of the cube with the fiducial markers, presented before. Its assembly is pretty straightforward, just print the layout, cut through the guide lines and glue it together. Beware, the folding flaps of the cube aren’t present in the layout, so you can use the ones that help you the most.
If you found the tutorial above useful, we’d appreciate that you reference us. You can do so by adding the following to your bibliography:
@inproceedings{cuberev, address = {Columbia University, New York, USA}, author = {Menezes, Paulo and Gouveia, Nuno and Patr{\~{a}}o, Bruno}, booktitle = {14th International Conference on Remote Engineering and Virtual Instrumentation - REV 2017}, title = {{Touching is believing - Adding real objects to Virtual Reality}}, year = {2017}}
- Details
- By Paulo Menezes
- Category: Augmented & Virtual Reality Module
- Hits: 2839
Augmented reality has recently received an enormous amount of attention from both general public but also commercial companies.
The game industry has been attentive to the long promised augmented reality, but technical difficulties have limited the achievable quality and this has postponed its inclusion in the offered games until recently. The increasing computational power of game consoles and the current awareness of general public to this type of technology makes impossible to ignore it at the risk of losing visibility to other competing companies that invest on it.
- Details
- By Paulo Menezes
- Category: Augmented & Virtual Reality Module
- Hits: 956
This article explains the basic concepts of computer vision necessary to understand how to build marker-based AR applications.
It includes the basic projective geometry concepts, such as homographies, without going into deep theoretical details, but giving pointers to the necessary concepts.
TBC
- Details
- By José Francisco
- Category: Augmented & Virtual Reality Module
- Hits: 1006
( Developed by José Francisco for his MSc thesis )
Eye trackers can provide valuable information about the user reactions or interest even in Virtual Reality Systems. In these cases, and especially when head mounted displays (HMD) are in use the solution is to install the image capture setup inside the HMD itself.
In this article you can find the description of the construction of a low cost solution for the Oculus Rift DK2.
![]()
The IS3L ..
is part of the
Institute of Systems and Robotics
and is located at
R. Sílvio Lima
3030-290 Coimbra, Portugal
Meet us
+351 239 796291
PauloMenezes (a) isr (dot) uc (dot) pt